If you get a sourdough starter that is dehydrated, you can follow the steps below to revive it first. Once you have a cup or so, you can use just about any recipe. Just don’t forget to reserve a cup of starter for your next batch!
Reviving a Dehydrated Sourdough Starter
*Soak 1 tsp-1Tbsp starter in 1Tbsp lukewarm bottled spring or purified water, or well water (or chlorinated tap water that has sit out overnight to get rid of chlorine might work). Chlorine will kill your starter and there is just a bit in that tsp. I think it’s better to be safe on this step!
*After starter dissolves, add 1 Tbsp flour and stir. Cover loosely with plastic wrap (or I use a plastic lid on a quart jar). Do not tighten the lid. It needs to breathe. 🙂 Allow it to sit for 24 hours. You can stir twice during the 24 hours to speed things up a bit.
*Stir in another 1 Tbsp of flour and another 1 tsp of water. During the next 24-36 hours, it should start to bubble. When it bubbles, do a little happy dance and welcome your starter into your home.
*Stir in 1/3 c flour and 1/4 c water once or twice daily to feed the starter. Do this until you have enough for baking. Many recipes will say you need 1 1/2 to 2 cups of starter. If the recipe doesn’t say so, remove a cup of starter before adding anything other than flour or water to preserve your starter.
*Store your starter in a container with a loose fitted lid in the refrigerator and feed weekly with equal parts flour and water. I like to use 1/4 of each if I’m not going to be using my starter that week. I use a quart jar with a plastic canning lid. I have heard not to use metal lids, but my starter never touches the lid. I’m probably being overly cautious.
My mother always kept sourdough in our home. My grandfather (her father) did the same. He had written his own little book about sourdough and how to take care of it.

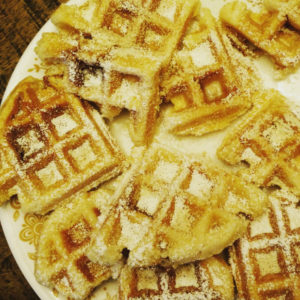
My favorite sourdough recipe by far was the sourdough waffles they both made. This recipe is adapted from Adventures in Sourdough Cooking and Baking by Charles D. Wilford. It was written in 1971 and I think that is probably about the time my grandfather bought it, along with some San Francisco Sourdough Starter. I found a used copy on Amazon. I know there are many books about sourdough, but I like this one for nostalgic reasons. One thing to note is that you can find some sourdough crackerrecipes to use up your starter if you don’t bake bread or make waffles too often and end up with too much starter. Just to get you started, take a look at the cracker recipe at Kitchen Stewardship here and a biscuit recipe from Honey Pot here. King Arthur Flour has some good ideas here, and some from The Perfect Load here.
Sourdough Waffles
adapted from Adventures in Sourdough Cooking and Baking by Charles D. Wilford
yield: 5- 6in waffles
1 1/2 cups Primary Batter (Make with 1 c starter, 1 1/2 c flour, 1 c warm water- yields 1 1/2 c batter for baking and 1 c to put back as starter)
2 eggs separated (incidentally, I never separate them and my waffles are just fine. I think the finished waffle might be more fluffy if you separate.)
2 tsp sugar
1 tsp salt
1/4 c melted butter
1/4 c milk
- Prepare Primary Batter, making sure to return 1 c starter to your container for later use.
- Assemble ingredients and let them come to room temperature.
- Put 1 1/2 c Primary Batter in a warm bowl. (I use a room temperature bowl and don’t have any issues.)
- Separate the eggs and lightly beat the yolks, stir them into the batter. (Optional lazy cook way: Just add both eggs without separating and skip step 7).
- Stir 2 tsp sugar and 1 tsp salt into the batter.
- Stir the 1/4 c melted butter and 1/4 c milk in to the batter.
- Beat egg whites to soft peaks and fold into batter.
- Pour the batter onto a preheated waffle iron. The iron should be slightly hotter than when making regular waffles.The batter should be thin enough that it spreads and covers the whole surface of the iron when it is closed. Close the iron. Adjust the remaining batter with water or flour to proper consistency if needed.
- After about 6 minutes or when no more steam is coming out of the waffle iron, lift the top. Waffles are golden brown when done. Leave for an additional minute if needed.
- Serve hot. Because of the large amount of butter, you may not need additional butter on top. Top with your favorite toppings and enjoy!
