Essential Oil Recipes for Less Stress for the Holidays with FREE Pretty Printable Recipe

Free Printable Holiday and De-Stress Essential Oil Recipe

Remember the scent of Thanksgiving or Christmas when you were a child?

Diffused essential oils can be used for stress management with the added bonus is that they make your house smell fantastic! Scents are strongly linked with memory, so filling your home with a warm comforting scent from childhood can really help relieve stress and bring you back to a relaxing and joyous time!

Free Printable Holiday and De-Stress Essential Oil Recipe

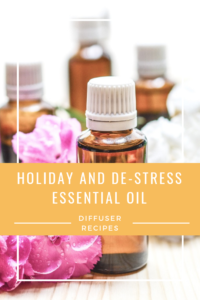
According to the National Association for Holistic Aromatherapy,  certain oils promote a sense of calm. I’ve used their recommendations to create recipes to promote Holiday joy and relaxation. All recipes are for a diffuser, but you can easily use the ratios here to make  a spray or roll on by adding them to water (spray) or carrier oil (roll on). Please be cautious and use care and safety guidelines in selecting which oils to diffuse, spray, or roll on.  I have included a safety link below to make that part easy!

Essential Oils

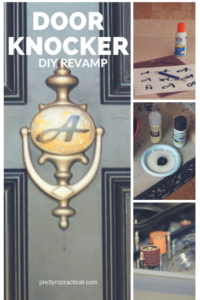
Right click the image to download and print out the free recipes for diffusing calming and holiday scents!

**Note: Before using any essential oils, check with a medical professional if you have health concerns, or are pregnant or nursing.

**Also, please take time to understand safe practices with essential oils before using them. Here is a great guide to Aromatherapy Safety.

3 All Natural Ways to Moisturize and Beat Dry Skin Now with 5 Kitchen Items

Do you get dry skin when it starts to get cold outside? I sure do! And it keeps up until spring. Once I was at a meeting and looked down to find the skin on my arm was dry and flaking, like some kind of scary arm dandruff. I was horrified and tried to hide my arms. I didn’t want that to happen again. So I started looking for something to moisture my sensitive skin. I like to use more natural products on my skin because it’s fairly sensitive. It’s hard to find products that are natural, non-toxic, and reasonable priced. So I turned to the kitchen, since most edible items are non-toxic. I found several combinations have worked well for me.


Fix Dry Skin with 5 Kitchen Items

1. COCONUT OIL and BAKING SODA
Remove that top layer of dead dry skin by exfoliating with equal amounts of coconut oil and baking soda. Just put a teaspoon or so of each in your hand and rub them together to melt the coconut oil before applying to your face or body. Use small circular scrubbing motions to exfoliate. I recommend using this no more than 2-3 times a week. I keep a jar of coconut oil and an old spice jar with shaker top in my bathroom for this use. Sometimes I just use water and the baking soda if my skin isn’t feeling very dry.
Bonus tip: add a drop of essential oil that is good for skin, or just smells good. Lemon, frankincense, or lavender might be good additions.
CAUTION: Use essential oils with extreme care! For example, citrus oils can cause extreme photosensitivity/burning in the sun. Lavender oil has been found to disrupt hormones of young men. Please take time to learn about any essential oil before use!
2. SALT, COFFEE, and ALMOND OIL
Salt, coffee, almond oil scrub for the body (works for cellulite and varicose veins too)
3 T salt dead sea salt, Himalayan, plain sea salt, etc.
1 T coffee or espresso grounds
1 t almond oil
Use as a body scrub in the shower. BONUS: This smells divine!!
Also: I like to extend the shelf life by mixing the coffee and salt ahead if time. I keep the container in the shower and add coconut or almond oil to my hand when I use it.
3. PURE OIL (OLIVE, COCONUT, ALMOND, etc.)
Moisturize your face and body with pure olive oil.
Just use it sparingly at night for a terrific overnight moisturizer. If olive oil is too​ heavy, try some coconut oil or almond oil instead.

Sourdough Starter and Sourdough Waffle Recipe

If you get a sourdough starter that is dehydrated, you can follow the steps below to revive it first. Once you have a cup or so, you can use just about any recipe. Just don’t forget to reserve a cup of starter for your next batch!

Reviving a Dehydrated Sourdough Starter

*Soak 1 tsp-1Tbsp starter in 1Tbsp lukewarm bottled spring or purified water, or well water (or chlorinated tap water that has sit out overnight to get rid of chlorine might work). Chlorine will kill your starter and there is just a bit in that tsp. I think it’s better to be safe on this step!

*After starter dissolves, add 1 Tbsp flour and stir. Cover loosely with plastic wrap (or I use a plastic lid on a quart jar). Do not tighten the lid. It needs to breathe. 🙂 Allow it to sit for 24 hours. You can stir twice during the 24 hours to speed things up a bit.

*Stir in another 1 Tbsp of flour and another 1 tsp of water. During the next 24-36 hours, it should start to bubble. When it bubbles, do a little happy dance and welcome your starter into your home.

*Stir in 1/3 c flour and 1/4 c water once or twice daily to feed the starter. Do this until you have enough for baking. Many recipes will say you need 1 1/2 to 2 cups of starter. If the recipe doesn’t say so, remove a cup of starter before adding anything other than flour or water to preserve your starter.

*Store your starter in a container with a loose fitted lid in the refrigerator and feed weekly with equal parts flour and water. I like to use 1/4 of each if I’m not going to be using my starter that week. I use a quart jar with a plastic canning lid. I have heard not to use metal lids, but my starter never touches the lid. I’m probably being overly cautious.

My mother always kept sourdough in our home. My grandfather (her father) did the same. He had written his own little book about sourdough and how to take care of it.

Sourdough Starter and Sourdough Waffle Recipe

My favorite sourdough recipe by far was the sourdough waffles they both made. This recipe is adapted from Adventures in Sourdough Cooking and Baking by Charles D. Wilford. It was written in 1971 and I think that is probably about the time my grandfather bought it, along with some San Francisco Sourdough Starter. I found a used copy on Amazon. I know there are many books about sourdough, but I like this one for nostalgic reasons. One thing to note is that you can find some sourdough crackerrecipes to use up your starter if you don’t bake bread or make waffles too often and end up with too much starter. Just to get you started, take a look at the cracker recipe at Kitchen Stewardship here and a biscuit recipe from Honey Pot here. King Arthur Flour has some good ideas here, and some from The Perfect Load here.

Sourdough Waffles

adapted from Adventures in Sourdough Cooking and Baking by Charles D. Wilford

yield: 5- 6in waffles

1 1/2 cups Primary Batter (Make with 1 c starter, 1 1/2 c flour, 1 c warm water- yields 1 1/2 c batter for baking and 1 c to put back as starter)

2 eggs separated (incidentally, I never separate them and my waffles are just fine. I think the finished waffle might be more fluffy if you separate.)

2 tsp sugar

1 tsp salt

1/4 c melted butter

1/4 c milk

  1. Prepare Primary Batter, making sure to return 1 c starter to your container for later use.
  2. Assemble ingredients and let them come to room temperature.
  3. Put 1 1/2 c Primary Batter in a warm bowl. (I use a room temperature bowl and don’t have any issues.)
  4. Separate the eggs and lightly beat the yolks, stir them into the batter. (Optional lazy cook way: Just add both eggs without separating and skip step 7).
  5. Stir 2 tsp sugar and 1 tsp salt into the batter.
  6. Stir the 1/4 c melted butter and 1/4 c milk in to the batter.
  7. Beat egg whites to soft peaks and fold into batter.
  8. Pour the batter onto a preheated waffle iron. The iron should be slightly hotter than when making regular waffles.The batter should be thin enough that it spreads and covers the whole surface of the iron when it is closed. Close the iron. Adjust the remaining batter with water or flour to proper consistency if needed.
  9. After about 6 minutes or when no more steam is coming out of the waffle iron, lift the top. Waffles are golden brown when done. Leave for an additional minute if needed.
  10. Serve hot. Because of the large amount of butter, you may not need additional butter on top. Top with your favorite toppings and enjoy!

Quick and Easy Summer Salad

I love this salad because it’s quick and easy, but there is also something  simple and slightly elegant about it’s flavors. It’s a traditional Russian Salad (Russkij Salat) that just denotes summer for me. I ate it in almost every household I visited in Russia and Uzbekistan. Tomatoes,  cucumbers, and dill are all easily grown in pots, so just about anyone can have a small garden to grow these ingredients!

Quick and Easy Summer Salad

“Russkiy Salat”

  • 1 large cucumber
  • 2 large tomatoes
  • 1 T dill weed (fresh is best, but dried works too!)
  • 1 tsp pepper
  • 1 tsp salt (try smoked salt for great non-traditional flavor!)

Slice or dice tomatoes and cucumbers to your preferred size/shape.

Add seasoning and stir. That’s it!

Blender Pie Free Printable Recipe

This is another easy recipe made with my DIY Biscuit Mix! Just use the home made in place of Bisquick!

If you are in a hurry for a dessert or have unexpected company coming, it’s easy to put together this pie from pantry staples. I love that about this recipe. Our kids even learned to make it when they were 9 or 10.  Because a lot of dried flaked or shredded coconut contains chemicals, I recommend using an organic unsweetened flaked or shredded coconut like this one.

I found this recipe in a newspaper at least 15 years ago. It was in a column called “Good Neighbors” where people would write in and ask or give recipes or tips. At the time, the “good neighbor” said it was over 30 years old and that her son made it in school. I have been using it as a pantry staple for years because I normally have all of these ingredients on hand. I use homemade biscuit mix instead of bisquick, and you can use any brand.  It kind of tastes like a coconut custard pie. I don’t always use a blender (I didn’t for the photo here, I just used a whisk and you can see the coconut flakes). My family likes cocoa added to it as well for a flavor somewhat like a mounds candy bar.

Blender Pie Recipe and Free Printable!

Right click to download the recipe, and then print in the size you desire!

How to Make Mesothelic (Room Temperature) Yogurt and a Yogurt Bread Recipe

How to Make Mesothelic Yogurt and a Yogurt Bread Recipe

I’ve been experimenting with cultured foods lately. I have tried 4 types of mesothelic yogurts and I am loving them! This recipe works with viili, filmjolk, matsoni, piima, or other room temperature yogurts.

You will need:
  • Starter culture
  • Jar with lid (a quart jar works well)
  • Milk or cream (not ultra-pasteurized)
Take yogurt from previous batch of yogurt to use as starter culture (1 Tablespoon for every 8-10 oz of desired yogurt).
Place starter culture in a clean jar (you will need a lid).
Add milk to desired amount. Example: 1 Tablespoon starter yogurt and 8 oz of milk makes 8 oz of finished yogurt).
Cover with lid and allow to sit for 10-12 hours or until the yogurt pulls away from the side of the jar when jar is tipped.
This isn’t an exact science, using more milk or less starter just means it will take a bit longer. If your “room temperature” is warmer, your yogurt will culture more quickly.  If you find it is ready too soon, use less starter or use more milk to have the batch ready later. When the yogurt looks like it is starting to curdle or separate into curds and whey, it is a bit over cultured. It is still good, but must be stirred and loses a bit of it’s creaminess. It will also taste a little more tangy. Experiment a little to find what works for you and what taste you prefer.
Use any type of milk you like. Milk with less fat will make thinner yogurt. If you want thicker yogurt, you can put some in a coffee filter until some of the whey drains out and it is the consistency you like. (Use the whey for lacto fermenting vegetables!) If you leave it longer, the majority of the whey will drain out and you will be left with cream cheese. Add some herbs or fruit and enjoy on bagels 🙂
You can do a second ferment after removing starter for your next batch by adding fruit if you desire. Or just add fruit, honey, maple syrup, vanilla, (or whatever sounds good) to taste.
How to Make Mesothelic Yogurt and a Yogurt Bread Recipe

Yogurt Bread (tastes like sourdough)

Put equal amounts of yogurt and flour in a bowl and stir to make a sponge. You may need to add one or the other to make a sticky sponge that is thicker than pancake batter, but not as thick as dough.
Example: 1/2 cup yogurt and 1/2 cup flour.
Allow to culture for 12 hours.
Add a pinch of salt. Optional: add 1 teaspoon sugar and 1 Tablespoon butter or olive oil and any desired spices (garlic? italian herbs? dill?)
Add flour 1/2 cup at a time until you have a soft dough. Shape as desired for loaf (bread sticks sprinkled with garlic and parmesan anyone? pizza crust?).
Allow to rise for several hours.
Bake at 375 degrees F until crust is brown.

Remove and cool before cutting. 

DIY Biscuit Mix Recipe and Waffle Maker Cinnamon Rolls

I got this biscuit mix recipe from another mom almost 15 years ago. I have been using it ever since. My husband will buy pancake mix in a box on occasion, but I normally just make this.

DIY Biscuit Mix Recipe and Waffle Maker Cinnamon Rolls

I have used a variety of flour combinations, and can up to 1/2 whole wheat with great success. Success means my family won’t complain about the whole wheat biscuits, pancakes, cobbler topping, and waffles, etc.

DIY Biscuit Mix Recipe and Waffle Maker Cinnamon Rolls
Biscuit Mix

DIY Biscuit Mix

9 c flour (I like 1 c oat flour,  4 c whole wheat, and 4 c unbleached white flour. Feel free to experiment!)

1/3 c baking powder

1 T salt

1 t cream of tartar

1/4 c sugar

2 c shortening ( I like to use coconut oil too. It works great! Unless you want to refrigerate, use something that will keep in the pantry.)

Mix by hand, with a food processor, hand mixer, or stand mixer until it resembles coarse crumbs. Use this for any biscuit mix recipe!

Every time I make this, I feel thankful for my stand mixer and my mother in law. I hear so many negative mother in law stories, I feel like I should sneak in a good one! My super amazing mother in law got me my stand mixer for my first birthday after marrying her son. She is gone now,  too​ young, but what a humongous blessing it was to have had a mother in law that not only would buy me a gift like that, but was so loving and supportive of our family!

DIY Biscuit Mix Recipe and Waffle Maker Cinnamon Rolls

DIY Biscuit Mix and Waffle Maker Cinnamon Rolls

To make the waffle maker cinnamon rolls, just mix up a batch of biscuit dough. I just dump in a couple of cups of the mix and add enough milk (or milk substitute/water) to make biscuit dough consistency. Then roll the dough out in a large rectangle just under 1/2 inch thick. Brush the dough rectangle with melted butter or coconut oil, sprinkle with
enough brown sugar just to cover and then dust it with cinnamon. You can add raisins at this point if you like!

Roll the dough into a log and cut into slices. Put slices into the waffle maker at the same temperature as waffles and cook as per your waffle maker directions. Mine cooked in the same amount of time and the same temperature as waffles, despite the fact that they were much more dense than waffle batter.

I dusted them with powdered sugar, and some ate them like that while others added syrup. You could make an icing or glaze if desired.

Overall, they were super easy and tasted like cinnamon rolls without the wait time for proofing and rising with traditional cinnamon rolls.


DIY Fun Bible Story Boxes for Kids

DIY Fun Bible Story Boxes for Kids

DIY Fun Bible Story Boxes for Kids
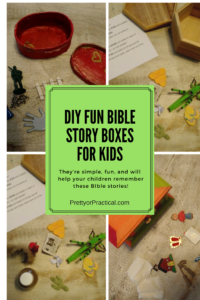
When our kids were preschoolers, I made these fun little Bible Boxes for them. I was inspired by making our own Resurrection Eggs, where you open the eggs and talk about the items inside and how they relate to the Easter story. I thought it might be fun to have some interactive and tactile boxes for several other Bible stories. I put the items and stories in little boxes from the craft store, but you could use tupperware containers for printable/foldable takeout style boxes from the internet if you don’t want to go out and buy some. I got some of the items from the dollar store, some from the craft store (miniatures), some from my kids toy boxes, etc. Feel free to use whichever items you can find or have on hand. I adapted to what I could find. You could even print an image of a crown in you can’t find one, for example. As you read through the story, have the child find the item that goes with the story (in parenthesis and bold). Kids love retelling the story from the items after it has been read to them too. I hope you and your child or children enjoy these as much as we did!!

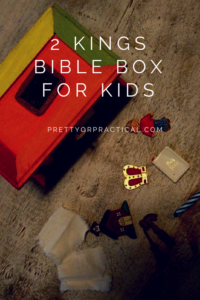
 Rebuilding of the Temple from 2 Kings 22-23

Josiah was eight years old when he became king (BOY, CANDLE), and he reigned in Jerusalem thirty-one years. He did what was right in the eyes of the Lord and followed completely the ways of his father David, not turning aside to the right or to the left.

In the eighteenth year of his reign, King Josiah (CROWN) had people start to work on the temple of the Lord. He sent money to pay the workers who repair the temple of the Lord—the carpenters, the builders and the masons. (HAMMER/SCREWDRIVER)

The workers found the Book of the Law while they were working and sent it to King Josiah. The high priest said to the the secretary, (BIBLE) The king’s secretary read from the book in the presence of the king.

When the king heard the words of the Book of the Law, he tore his robes (TORN FABRIC) in sadness because he knew the Lord’s was angry because the people had not obeyed the words of this book. Then the king called together all the elders of Judah and Jerusalem. He went up to the temple of the Lord with the people of Judah, the inhabitants of Jerusalem, the priests and the prophets—all the people from the least to the greatest. He read and taught (SCHOOL) the words of the Book of the Covenant, which had been found in the temple of the Lord. The king and the people renewed the promise to the Lord—to follow the Lord and keep His commands.

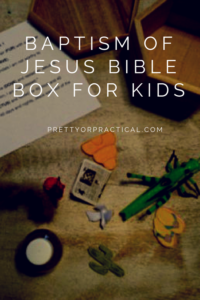
John The Baptist and the Baptism of Jesus from Matthew 3-4 and Mark 1

John the Baptist lived in the desert (SAND), wearing clothing of camel’s hair (FUR) with a leather belt. He ate locusts (LOCUST/GRASSHOPPER) and wild honey (BEEHIVE).

John said “after me comes One more powerful than I, One whose sandals I am not worthy to untie” (FLIP FLOPS/SANDALS).

When John baptized Jesus, the Holy Spirit descended like a dove (DOVE) and rested on Jesus. A loud voice from God said “This is my son, whom I love; with Him, I am well pleased.”

Then Jesus went in to the desert with the wild animals (CACTUS) and fasted for 40 days and 40 nights. Angels came and attended to him (ANGEL). After 40 days and nights, Jesus went out of the desert, telling the Good News (NEWSPAPER).

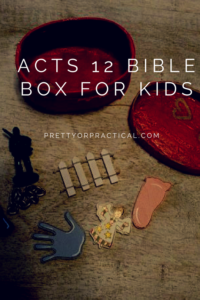
Peter’s Miraculous Escape From Prison from Acts 12

Peter was put into prison and guarded by soldiers (TOY SOLDIER) because He followed Jesus. Jesus’ followers, the church, were praying for him (HAND).

Peter was sleeping between two soldiers (TOY SOLDIER) and bound with chains. An angel (ANGEL) appeared and woke Peter. A light (CANDLE) shone down on him and the chains fell off (CHAINS).

Peter followed the angel (ANGEL) out of prison, past the guards (TOY SOLDIER). The gate (GATE) to the city opened by itself!

Peter walked (FOOT) the length of one street and the angel disappeared. He went to his friends who had been praying and told them how the Lord sent an angel to rescue him!

Inexpensive DIY Door Knocker Revamp

Inexpensive DIY Door Knocker Revamp

When we moved into our house, there was a personalized door knocker with the previous owner’s name on it. So we measured and went to look for a door knocker to replace it. We looked high and low (and at Lowe’s). We looked at Home Depot and Ace Hardware and at all sorts of places online. We simply could not find a door knocker the right size and color (silver or steel or brushed nickel). We weren’t picky, they just couldn’t be found! So I decided to try a little experiment!

Inexpensive DIY Door Knocker Revamp

First I used my best and trusty friend, my Dremel, to make the previous owner’s name disappear. I used the bit found above… the light tan colored stone bit. Don’t ask me what that bit is called… maybe a grinder of some sort? My husband didn’t like the look, but I told him the brushed metal finish is all over the Denver International Airport! It didn’t work 😦 Oh well, now what?

Inexpensive DIY Door Knocker Revamp

So I decided that maybe it wouldn’t look so bad if we added a painted monogram.
Here is how I did it!

I measured the area where I was going to put the monogram and printed out the letter “A” in a bunch of  different sizes and fonts. I chose one, and then cut it out with the exacto and mat. I cut all the pieces out and left them in place.

Inexpensive DIY Door Knocker Revamp

Then I sprayed the back of the paper (with all the pieces) with spray adhesive. Then I stuck the paper on the door knocker. I carefully removed the portion that was going to become the letter (the black part), leaving the white spaces in the letter.

Inexpensive DIY Door Knocker Revamp

This is my palette and brushes, and yes, I used the expensive Q-Tips! 🙂 Actually, I used them to put down a “primer coat”, which was just a test. Then I sprayed the monogram with the spray paint.

Inexpensive DIY Door Knocker Revamp

Once the paint was dry, I removed the paper. I noticed a few places where the paint bled a bit, so I used my trusty Q-Tips and a little nail polish remover to clean it up! After it was dry, I sprayed the oval part of the door knocker with the clear acrylic top coat. I don’t know how it will last, but I’m hoping it will work for a while. It’s not perfect, but at least it will give me a chance to find something!

Inexpensive DIY Door Knocker Revamp

Inexpensive Door Knocker Revamp

DIY Sourdough Crackers Recipe

DIY Sourdough Crackers Recipe

I’ve wanted to try making sourdough crackers for a while now, but was a little intimidated by the fact that I knew I had to roll it really thin. After making them, I can tell you that you don’t have to be intimidated by this at all. It’s really super easy and they are so yummy! 

DIY Sourdough Crackers Recipe

DIY Sourdough Crackers Recipe

I found a great recipe here at King Arthur Flour. I just substituted 1T nutritional yeast flakes (to make it taste cheesy) for one of the tablespoons of the herbs in the recipe. You could use parmesan too. I’m excited to try the next batch and maybe come up with some other flavors!

What flavor combos would you make?